These are our favourite day hikes in the Dolomites, suitable for different experience levels. We have included detailed instructions, a map and tips for getting to and from the trailhead.
By: Mark Barnes | Last Updated:
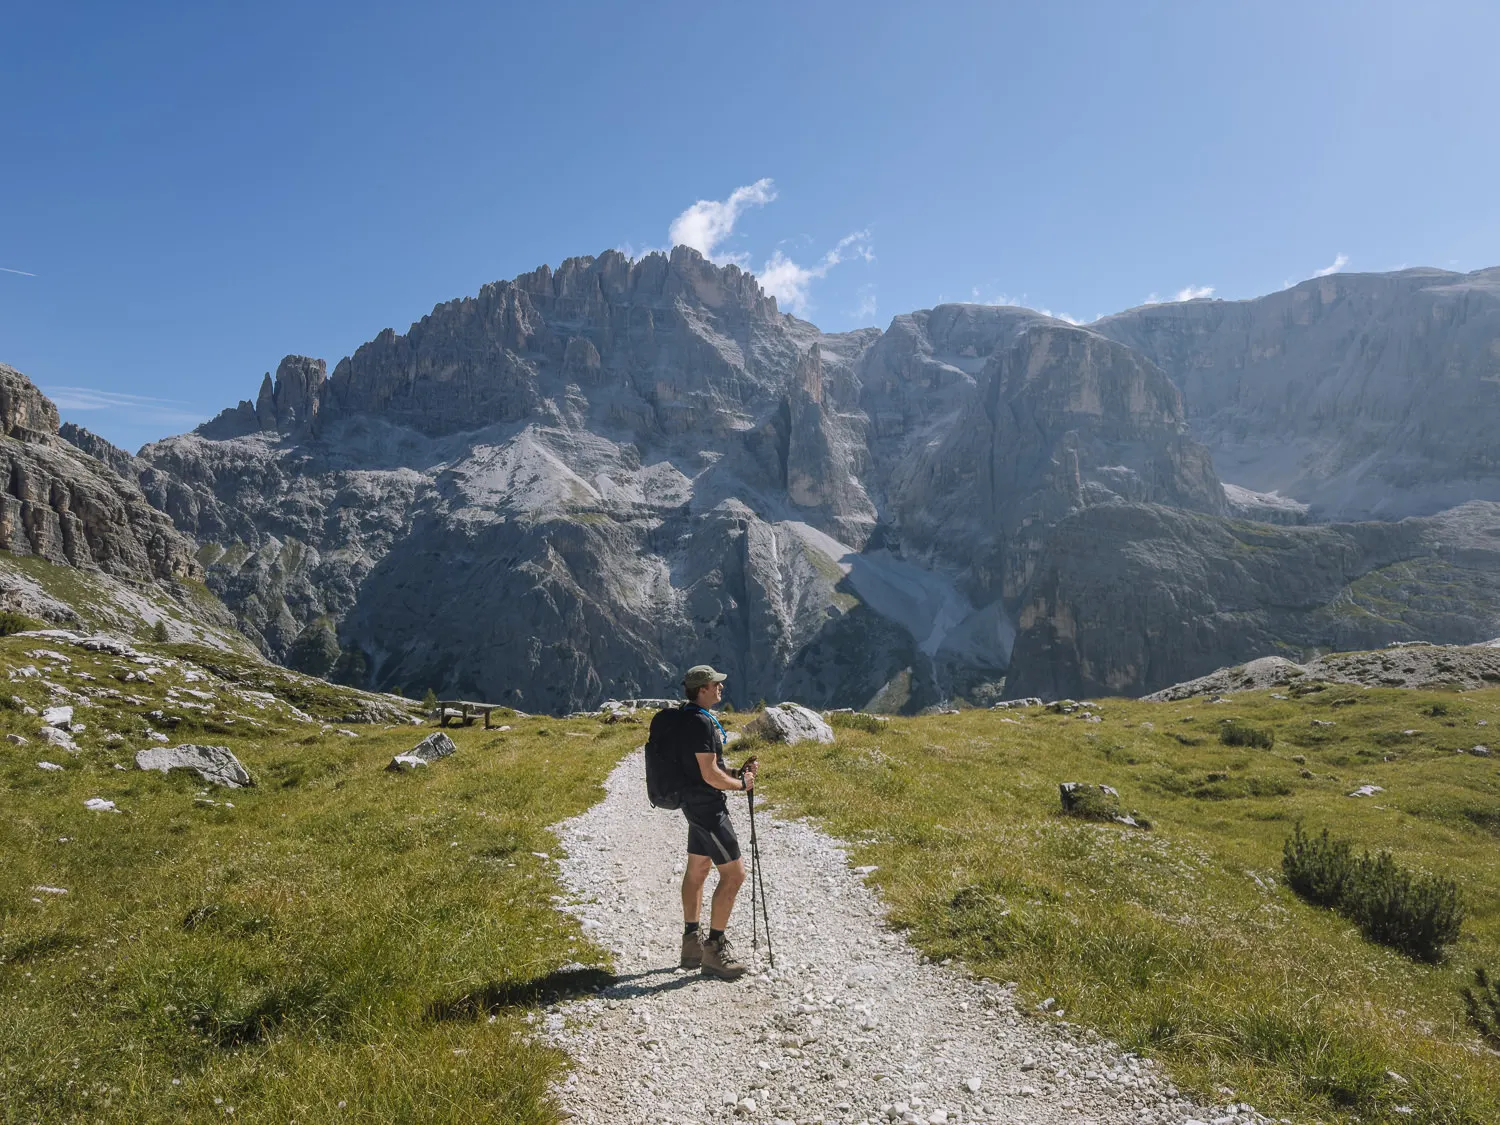
Even after many visits, the beautiful landscapes of the Italian Dolomites never cease to amaze us.
They stand apart from other mountain ranges primarily due to their dramatic limestone peaks. Crags that soar out of rolling green meadows, where the change from rural idyll to the inhospitable mountain is swift and stunning.
Paul and I have done plenty of hiking in the Dolomites, but this guide covers our favourite hikes. Some are little more than a gentle stroll; others will leave you panting at the top of a rocky peak.
We have included a map for each hike, instructions, directions to the trailheads, and advice on where to stay.
For other hiking destinations, read our guide on where to hike in the Alps.
Map: Dolomites Hikes
For each hike, we have given a quick overview of the highlights, details on how to get to the trailhead and hiking instructions with a map.
We have ordered them from easiest to most challenging so you can find a hike that’s right for you.
Many of the hikes have dedicated guides by us that go into greater detail.
The hikes are spread over a fairly wide area. Use our map below to find the ones nearest to where you are staying. Alternatively, read our Dolomites itinerary for some suggestions on how to spend a week in the area.
Click on the top right corner to open our map in your Google Maps app. Click the star next to the title to save it to your Google account.
Best Day Hikes in the Dolomites
1. Lago di Braies
- Start / Finish: Hotel Lago di Braies
- Distance: 3.5 km
- Duration: 1 hours 15 minutes
- Elevation: 50 m ascent and descent
- Difficulty: Easy
- Map: Lago di Braies Map
Lago di Braies is the most Instagram-friendly of the Dolomites’ lakes. Emerald water shimmers against dramatic cliffs, with romantic wooden boats lining the shore.
This very easy Dolomites hike circumnavigates the lake, passing a quaint chapel nestled among towering pine trees and a few shingle beaches.
It’s a beautiful but popular spot, so arrive early in the morning, just as the sun starts to rise over the peaks, or late in the afternoon for good evening light.
How to Get to Lago di Braies Trailhead
There are several large car parks next to the trailhead at Lago di Braies.
However, if you are hiking between mid-June and mid-September, between the hours of 9:30 AM and 4 PM, you must make a parking reservation in advance.
During those hours, you will not be allowed down the road to Lago di Braies unless you have a pre-booked reservation.
You can also park at Säge / Segheria and get the shuttle bus. Alternatively, get the 442 bus from Dobbiaco via Vallabass (Niederdorf) train station. More information is on the official website.
Hiking Instructions
The path around the lake takes just over an hour. It alternates between running along the edge of the water and diverting into the woods. You can’t go wrong. For more great ideas in the area, read our guide to Lago di Braies.
Facilities On Hike
There are toilets at the car parks and Hotel Lago di Braies, which also has a restaurant and bar overlooking the lake. We’d recommend taking your own picnic as it can be a bit touristy.


2. Val di Funes Panoramaweg
- Start / Finish: Santa Maddalena
- Distance: 7 km
- Duration: 2 hours 15 minutes
- Elevation: 250 m ascent and descent
- Difficulty: Easy
- Map: Val Di Funes Map
Val di Funes is a stunningly picturesque valley and another Instagram favourite. The highlight is two attractive churches, surrounded by hay fields, backed by the soaring spires of the Odle-Geisler peaks.
The best views are captured on this easy Dolomites hike along the Panoramaweg and Sunnseitenweg trails. The two paths traverse the edge of the Funes valley as undulating meadows unfurl below them.
Higher up, fields lined with colourful alpine flowers frame the two churches and their towering backdrop, forming one of the best sights in the Dolomites.
How to Get to Val di Funes Trailhead
The trail begins in Santa Maddalena, where there are several small parking spots. For public transport, the 330 bus runs roughly hourly up and down the Funes Valley from Bressanone (Brixen) train station to Santa Maddalena.
Hiking Instructions
Start in the town of Santa Maddalena and follow the roads up to Santa Maddalena church. From the church, take the path north-west, rising up the rolling hills for great views.
Follow signs for the Panoramaweg as it contours the valley and drops to meet another path. Turn right heading into San Pietro.
On the way back from San Pietro, take the lower Sunnseitenweg back to Santa Maddalena. More detailed instructions and a downloadable map are available on our Val di Funes guide.
Facilities on Hike
There are supermarkets in Santa Maddelena to make up a picnic lunch, and several cafes in San Pietro – the Albergo Kabis Gasthof Café has good coffee and great people watching.


3. Seceda
- Start / Finish: Top of Ortisei-Furnes-Seceda cable car
- Distance: 5.25 km
- Duration: 2 hours
- Elevation: 100 m ascent, 450 m descent
- Difficulty: Easy
- Map: Seceda Map
The views from the summit of Seceda are extraordinary and possibly the finest in the Dolomites. From the ridge, a jagged line of soaring spires appears like the teeth of a mangled saw.
Clouds regularly loiter below the top, creating a moody atmosphere.
The joy of this easy walk is that it hardly takes any effort. From the top of the dramatic ridge, it descends past several rifugios, each with spectacular views.
How to Get to Seceda Trailhead
The trail begins at the top of the Ortisei-Furnes-Seceda cable car. In peak season, queues for the cable car can be long, so try to go late afternoon.
There is undercover parking at the Ortisei cable car station and the 350 bus runs regularly along the Val Gardena valley floor, connecting Ortisei and Wolkenstein with Bressanone (Brixen) or Bolzano.
Hiking Instructions
Take the cable car from Ortisei past Furnes up to Seceda.
From here, ascend to the Seceda viewpoint overlooking the Odle-Geisler peaks. In 2025, the landowner set up a toll gate to the viewpoint which costs €5. It can be avoided by taking a parallel path to the south (adding 10 minutes).
From the viewpoint, it’s all downhill. Descend following path 1 past Troier Hut to Rifugio Firenze (Regensburger Hut). At the rifugio, turn right on path 2 and then shortly afterwards, left on path 5 to reach Col Raiser.
From Col Raiser, take the cable car into St. Christina, where the 350/352 bus regularly runs back to Ortisei.
Facilities on Hike
This popular area has plenty of facilities. Ristorante Seceda is at the top of the Furnes-Seceda cable car.
About a third of the way down, the excellent Troier Hut is open year-round. Regensburger (Rifugio Fierenze) is near the end of the walk and opens from June to October.

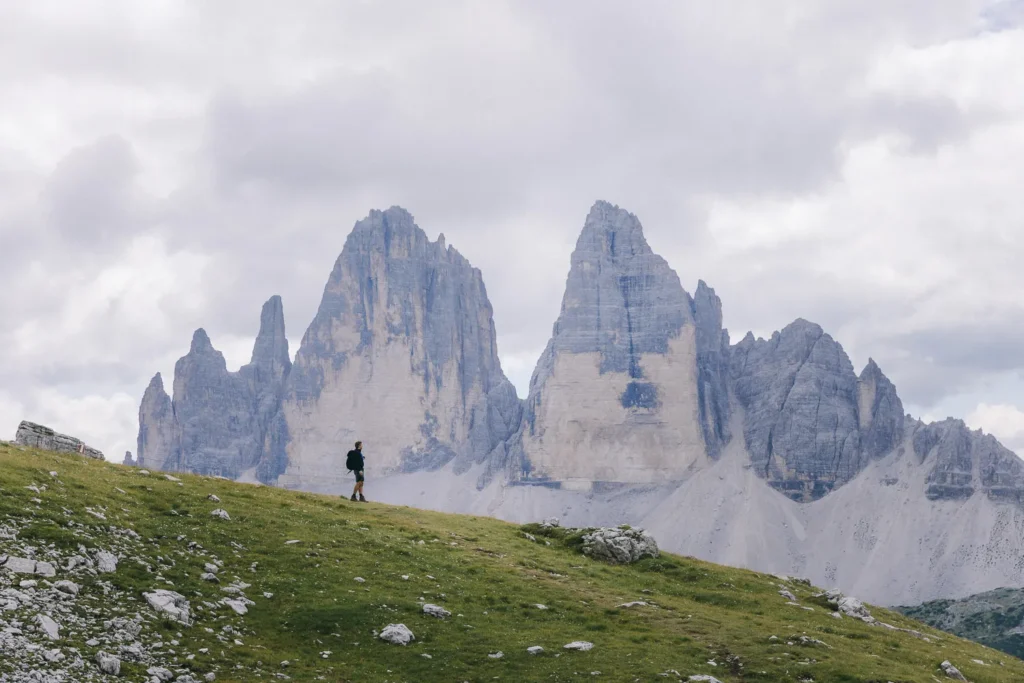
4. Tre Cime di Lavaredo
- Start / Finish: Rifugio Auronzo parking lot
- Distance: 10.3 km
- Duration: 3 hours, 20 minutes
- Elevation: 400 m ascent and descent
- Difficulty: Easy-Medium
- Map: Tre Cime Loop Map
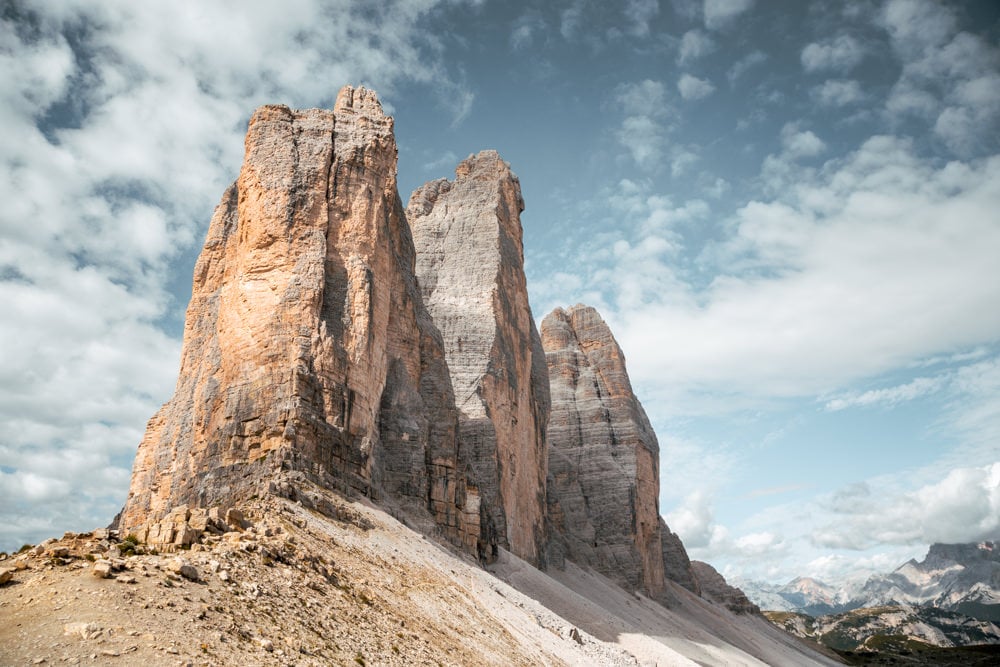
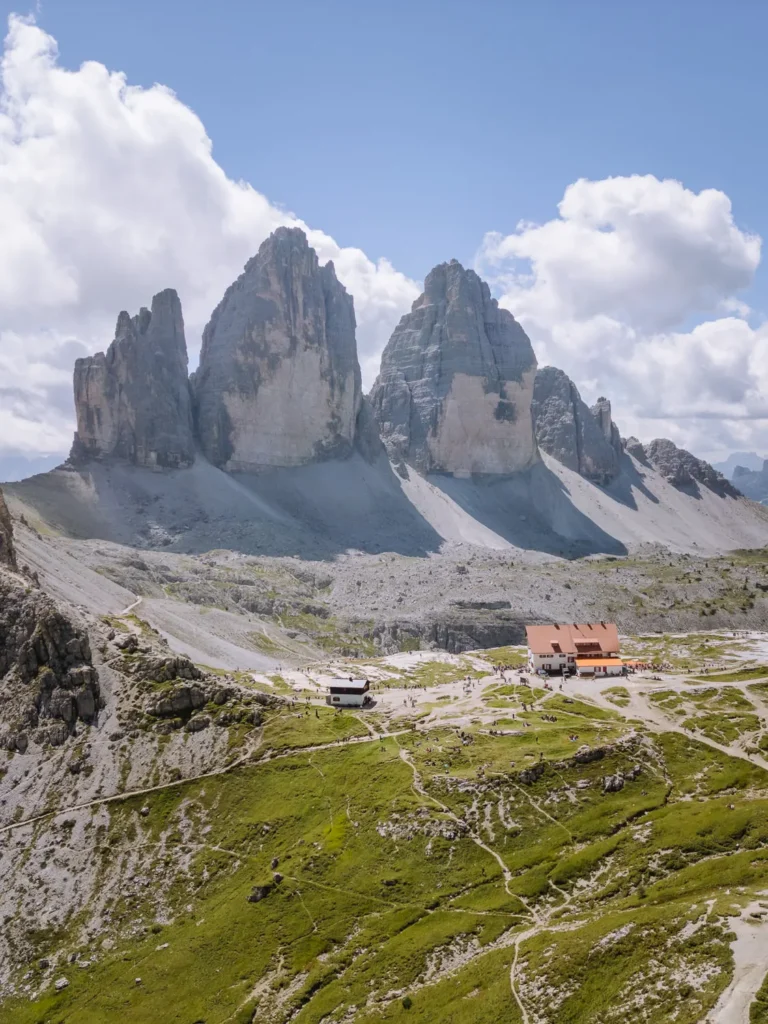
The Tre Cime di Lavaredo loop is possibly the finest hike in the Dolomites. Circling the three soaring spires of Tre Cime, this easy walk on simple to follow paths has breathtaking views the entire way.
There are lots of great photo opportunities, including the little chapel and the grotto above Rifugio Locatelli. Four rifugios with sensational views allow for regular breaks and refuelling.
If you only do one hiking trail in the Dolomites, make it this one.
How to Get to the Tre Cime Trailhead
Due to its popularity, in 2025, the authorities introduced parking restrictions for the car park at Rifugio Auronzo. You now must make a reservation in advance to be allowed access to the car park. Reservations cost €40 per day (€45 for campervans).
Alternatively, you can get a shuttle bus run from Misurina, or the 444 bus from Dobbiaco. The whole process has got a bit complicated. For the full breakdown, read our Guide to Hiking Tre Cime.
Hiking Instructions
The trail begins at Rifugio Auronzo. Take path 101 past Rifugio Lavaredo and over Forcella Lavaredo, before descending down to Rifugio Locatelli (Dreizinnenhütte).
Leave the rifugio on path 102, taking care to quickly turn left on path 105. It descends down a small canyon before rising up the other side and passing directly under the three Tre Cime peaks.
Stay on path 105 as it rises to Forcella la Col di Mezzo, where it turns left and heads back to Rifugio Auronzo.
More detailed instructions and a downloadable map are available on our Tre Cime Hiking Guide.
Facilities on Hike
There are 4 rifugios along the hiking route. All have restaurants or cafes and toilets, so there’s no need to bring supplies. The popularity of this hike has made the route very busy. Try to start early or in the late afternoon.

5. Cadini di Misurina
- Start / Finish: Rifugio Auronzo Car Park
- Distance: 3.4 km (1.7km each way)
- Duration: 90 minutes (45 minutes each way)
- Elevation: 180 m ascent and descent
- Difficulty: Medium
- Map: Cadini di Misurina Map
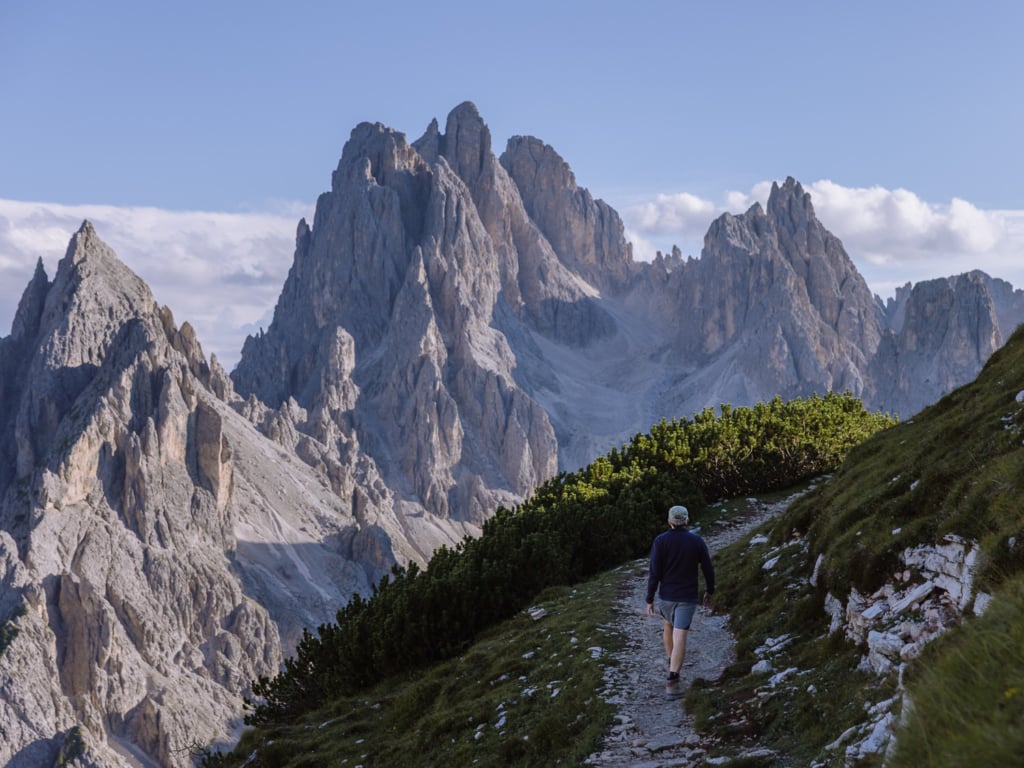
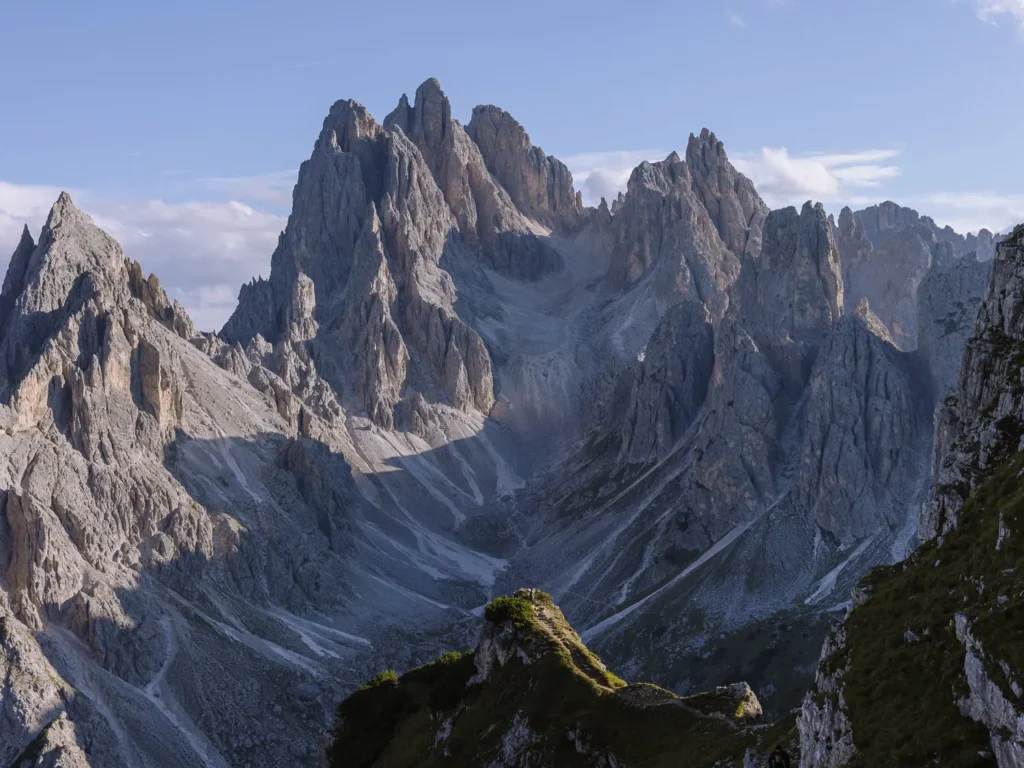
The Cadini di Misurina viewpoint stands on a small rocky outcrop that juts out of Monte Campedelle and overlooks a horseshoe of peaks and spires that make up the Cadini di Misurina massif.
Jagged pinnacles rise out of a sea of scree and rock, forming the perfect backdrop for photos. It’s probably the best view in the Dolomites.
This there-and-back walk to the viewpoint is not a great hike, but the views from the path are stunning. It’s a short walk, but we have rated it medium because the trail is narrow in places with a steep drop on one side. You need a decent head for heights.
The view is amazing at any time of day, but we were here at dusk, and the light on the mountains was spellbinding.
How to Get to the Cadini Viewpoint Trailhead
The trailhead is at the same spot as the Tre Cime trailhead, as detailed in the walk above, and many hikers combine the two walks into one great day out.
More detailed instructions and a downloadable map are available on our Cadini di Misurina Viewpoint Guide.
Hiking Instructions
From Rifugio Auronzo, take Path 117 southwards. It undulates over a couple of small hills, and great views of Tre Cime open up behind you.
Rounding a corner, the first views of Cadini di Misurina appear before you. The path now narrows to only a couple of feet wide, with precipitous drops on the left. It takes about 10 minutes until you reach a narrow arête that climbs to the viewpoint.
There’s often a queue for the main viewpoint, so either wait for your turn or take in the splendid views from the areas nearby. Head back the way you came.
Facilities on Hike
There are no facilities on the hike, but Rifugio Auronzo is at the beginning/end. It’s not the most atmospheric of rifugios but offers a chance to refuel.

6. Rifugio Nuvolau & Cinque Torri
- Start / Finish: Col Gallina
- Distance: 10.8 km
- Duration: 4 hours 15 minutes
- Elevation: 680 m ascent and descent
- Difficulty: Medium
- Map: Riugio Nuvolau Map
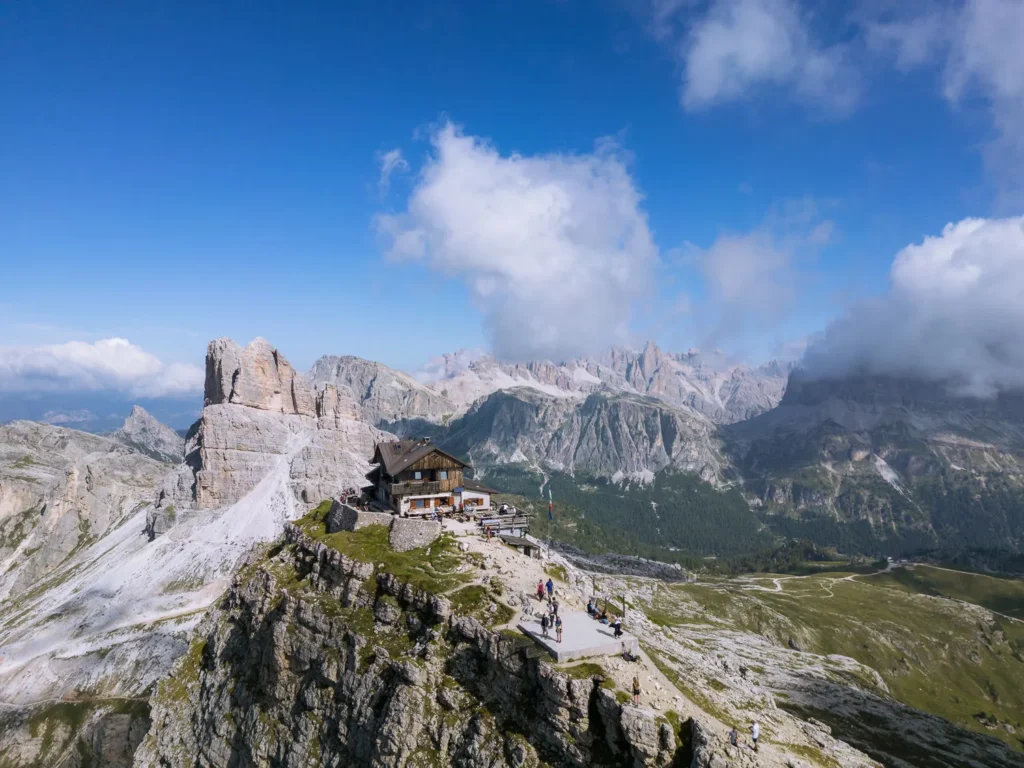
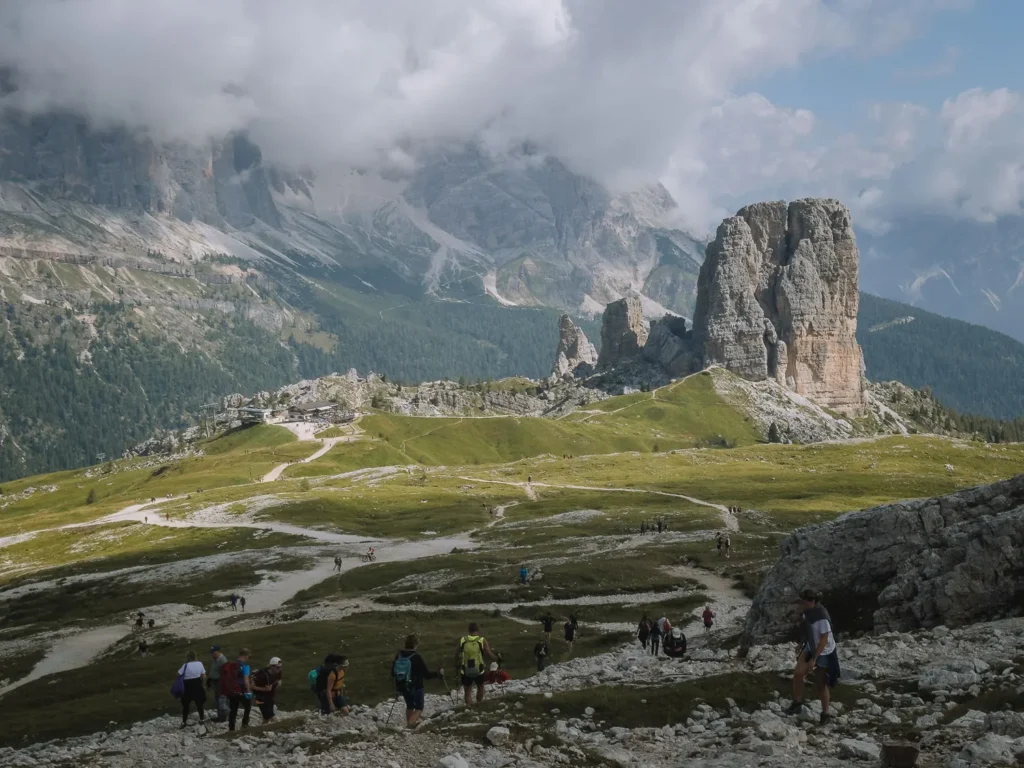
Rifugio Nuvolau is one of the most dramatically situated huts in the Dolomites. Perched on a rocky outcrop with sheer sides, it seems unreachable. Yet an excellent path winds its way to the summit for spectacular views.
The second section of this hike includes a stop at Cinque Torri, five dramatic towers of rock, with an open-air museum formed around the remaining WWI trenches and fortifications.
Cable cars head up to both destinations, so it’s popular with day trippers, but this path takes a quiet route up and down, leaving only the middle section busy.
It’s worth the effort just to have lunch at the rifugio with your head seemingly touching the clouds.
How to Get to the Rifugio Nuvolau Trailhead
The hike begins at Col Gallina near the top of the Falzarego Pass. There are numerous free parking spaces on either side of the road.
The 052 bus runs between Cortina, Pocol, and Passo Falzarego, stopping at Col Gallina on the route. From Cortina it takes only 32 minutes, but the bus is not very frequent. There are only three buses in the morning and three buses in the afternoon, so timing your journey is important.
Hiking Instructions
From Col Gallina, follow Path 419 through the trees to Lago Limedes. In early autumn, the lake may be empty, but for the rest of the year, it provides great reflections of the majestic tower of Monte Averau
The trail becomes steeper, and the trees give way to grassy flanks and rocky gullies. It merges with Path 441 and reaches the top of Forcella Averau, where stunning views unfold to the south.
From here, a narrow trail cuts along the top of a steep scree slope and under the vertiginous face of Monte Averau. It ends at Rifugio Averau, from where a rocky trail (path 439) ascends a wide rocky shoulder to Rifugio Nuvolau and the summit.
From here it’s all downhill. Take path 439 down to Rifugio Scoiattoli and Cinque Torri to explore the trenches, barbed wire, and munition dumps from WW1.
Descend on path 440 across a series of rocky ledges, and finally take path 424 back to Col Gallina. Full details are on our Rifugio Nuvolau and Cinque Torri Hiking Guide.
Facilities on Hike
There are three rifugios on the route. All of them are open from mid-June to the end of September. We highly recommend taking a break on the terrace at Rifugio Nuvolau.
Lunch is served between 11:30 AM and 2:30 PM; outside these hours, you can have coffee, beer and cake.
7. Brenta Dolomites
- Start / Finish: Grostè Gondola Lift
- Distance: 14 km
- Duration: 5 hours
- Elevation: 450 m ascent, 1,300 m descent
- Difficulty: Medium
- Map: Brenta Dolomites Map
Few head out to the Brenta Dolomites; we think that’s a mistake. Its rocky canyons, towering needles and massive blocks of stone are home to some of the best Via Ferrata in Europe.
But you don’t need to be clipped onto the iron road; trails weaving in and out of these natural wonders allow hikers up here, too.
This Dolomites hiking route is our favourite in the region. While long, it is not as hard as it may look.
A cable car takes care of most of the height, and a bus ride whisks you back into town.
How to Get to the Brenta Dolomites Trailhead
The trail begins at Passo del Grostè, which is at the top of the Grostè Gondola lift. Park at the Cabinovia Grostè cable car station just outside Madonna di Campiglio (€3.50 per day).
For public transport, it’s a short bus ride from Madonna di Campiglio on either the B642 or B201.
Hiking Instructions
Start at Passo del Grostè (Rifugio Stoppani), the final stop on the Grostè Gondola lift.
From the cable car, follow trail 316 as it winds around a rocky canyon and needle-shaped peaks. After 1 hour and 30 minutes, you reach Rifugio Tuckett, one of the best-located huts in the Dolomites.
Next, take path 328 (Sentiero del Fridolin) and then turn left on path 318, to Rifugio Brentei tucked deep in an amphitheatre of towering peaks.
Head back on path 318 to Rifugio Casinei, then take path 317 to Rifugio Vallisnella and get the bus back to Madonna di Campiglio (or follow the path through the pine forest, adding 1 hour and 4.5 km).
Facilities on Hike
There are plenty of bakeries and supermarkets in Madonna di Campiglio, but the four rifugios on route serve excellent food and drink. They are open during the summer season: June to September.


8. Aldof Munkel Trail
- Start / Finish: Ranui
- Distance: 16.5 km
- Duration: 5 hours
- Elevation: 1,000 m ascent and descent
- Difficulty: Medium
- Map: Adolf Munkel Map
While the Val di Funes Panoramaweg admires the peaks of Odle-Geisler from afar, this hike gets up close and personal with the jagged teeth and countless soaring spires.
There is nothing technically difficult on the walk, but the first hour up is a steep slog through the forest. Similarly, the last 60 to 90 minutes are also in the trees.
Fortunately, in between, a magnificent traverse under the rocky spires connects two very pretty but quite different rifugios.
Rifugio Malga Brogles is set high and wild in an alpine meadow. Whereas Rifugio Malga Glatsch is an Instagram favourite with a tiny lake and wooden rifugio backed by soaring peaks.
How to Get to Aldolf Munkel Trailhead
The trail starts at Ranui, where there is a car park costing €4 a day. For public transport, hop on the 330 bus, which runs from Bressanone (Brixen) train station to Ranui (final stop).
Hiking Instructions
Start in Ranui and take path 28 ascending steeply through a forest. After an hour the trees thin and the peaks appear. Turn right on path 35 (this is the Adolf Munkel Weg) to Rifugio Malga Brogles and great views.
From the rifugio, head back on path 35 as it traverses scree and boulders under the spires. Turn left on path 36, following signs down to Malga Glatsch and then Rifugio Zanes.
At Zanes turn left on path 33, back along the valley floor to Ranui.
More detailed instructions and a downloadable map are available on our Val di Funes guide.
Facilities on Hike
There are two excellent rifugios on this hike. Rifugio Malga Brogles has a fairly short opening season (July to September). Malga Glatsch is open from May to October in a lovely setting.
There are no shops in Ranui, but there is a small supermarket in Santa Maddalena.


9. Val Fiscalina Circuit
- Start / Finish: Hotel Dolomitenhof
- Distance: 17.8 km
- Duration: 6 hours 30 minutes
- Elevation: 1,175 m ascent and descent
- Difficulty: Medium-Difficult
- Map: Val Fiscalina Map
The most famous hike in the Sesto Dolomites is the Tre Cime di Lavaredo Loop. However, parking needs to be booked online in advance, making it difficult to choose a day with good weather and the paths are crowded.
An excellent alternative is the Val Fiscalina Circuit. The trail combines gentle grassy meadows, rocky ascents, sweeping terraces beneath giant crags, and narrow scree slopes.
It meets up with the Tre Cime Loop at Rifugio Locatelli for great views over Tre Cime, but throughout the entire walk, the scenery is ever-changing and magnificent.
There is nothing technically challenging, but it is almost 18km with over 1,000m of ascent and descent, and takes over 6 hours. Fortunately, there are 4 excellent rifugios on route, three of which have sensational views.
How to Get to via Fiscalina Trailhead
The trail is at Hotel Dolomitenhof. Next to the hotel is Via Fiscalina car park, but access is restricted between 9 AM and 4 PM from mid-June to early October. If you wish to bring your car during peak season, you must arrive at the car park before 8:45 AM.
To reach the trailhead by bus, take either bus 446 or 440 to the Pian di Val Fiscalina (Fischleintalboden) bus stop, which is right outside Hotel Dolomitenhof.
Hiking Instructions
From Hotel Dolomitenhof, follow path 102 south, then turn left on path 103. The trail contours beautifully under Cima Una and up the narrow Fiscalina Valley. First stop is Rifugio Zsigmondy Comici set under the soaring peak of Croda dei Toni.
From the rifugio, take path 101, as it twists and turns through a mix of rock, grassland, and old WWI ruins to Rifugio Pian di Cengia, an excellent place for lunch.
Now drop down a steep zigzag path and across the top of a scree slope to Rifugio Locatelli and the views of Tre Cime. Finally, take path 102 through a meadow often filled with cows and descend Val Del Sasso Vecchio to where you began.
More detailed instructions and a downloadable map are available on our Via Fiscalina Hike Guide.
Facilities on Hike
There are four excellent rifugios along this route, each offering something different. We highly recommend coffee at Rifugio Zsigmondy Comici for its great views.
Get lunch at Rifugio Pian di Cengia. The food is good (especially the apple strudel), and it’s a quiet spot before you join the crowds doing the Tre Cime loop at Rifugio Locatelli.
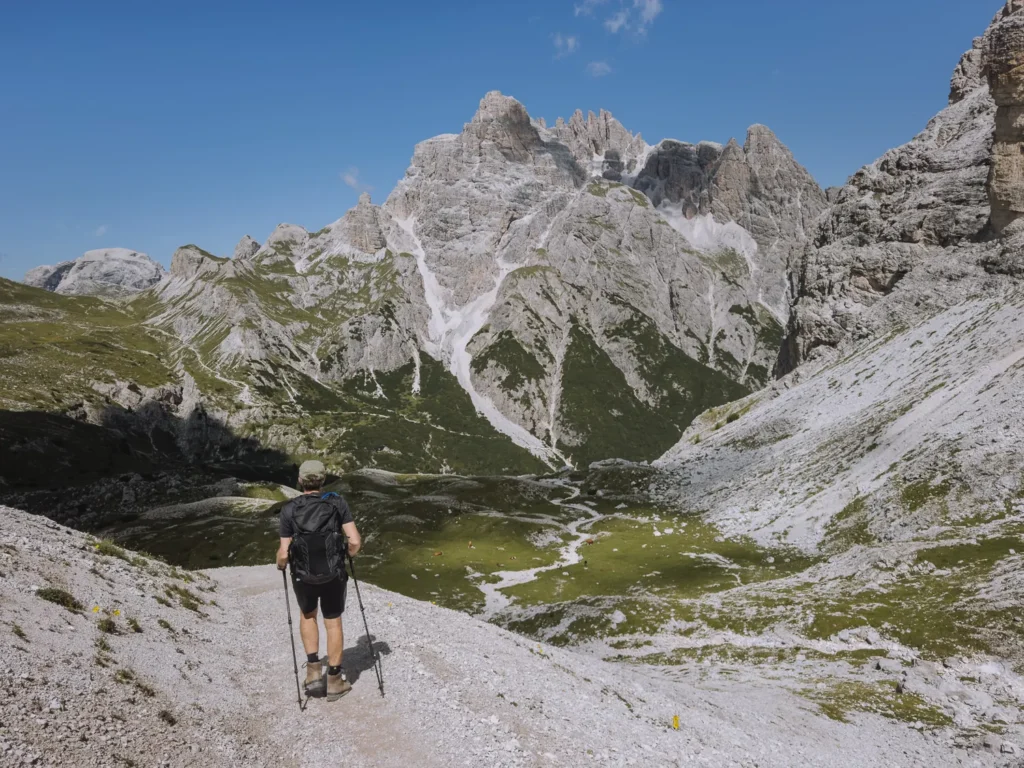
10. Torre dei Scarperi Lollipop
- Start / Finish: Antoniusstein Parkplatz
- Distance: 13.5 km
- Duration: 5 hours 30 minutes
- Elevation: 1,050 m ascent and descent
- Difficulty: Medium-Difficult
- Map: Torre dei Scarperi Map
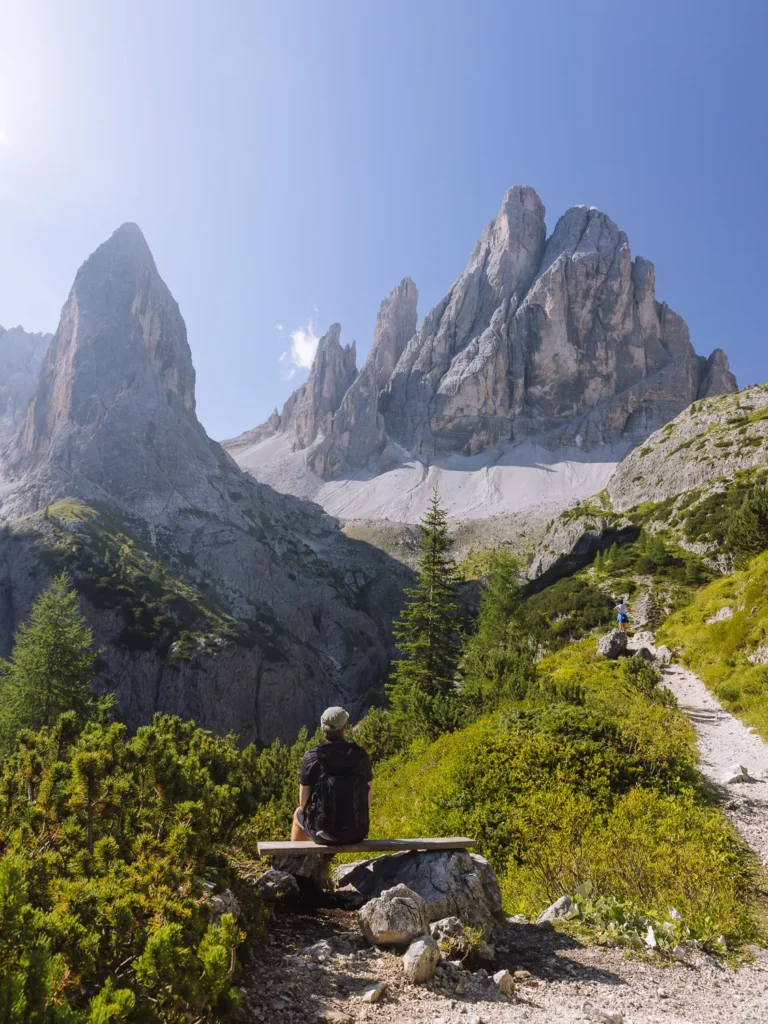
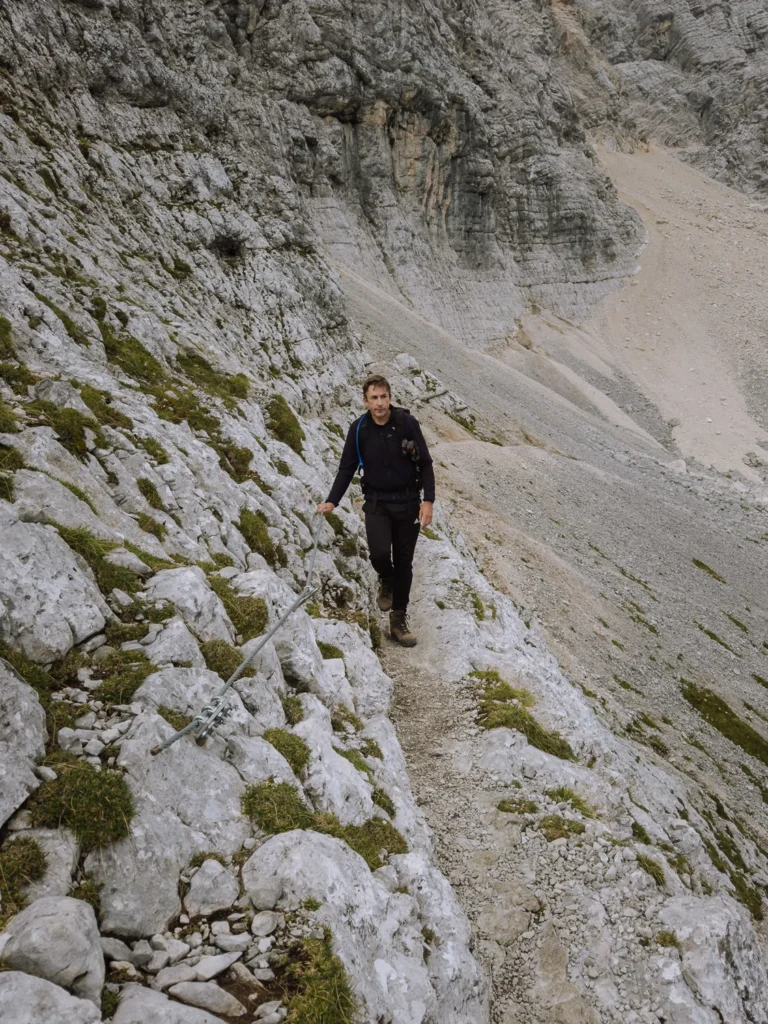
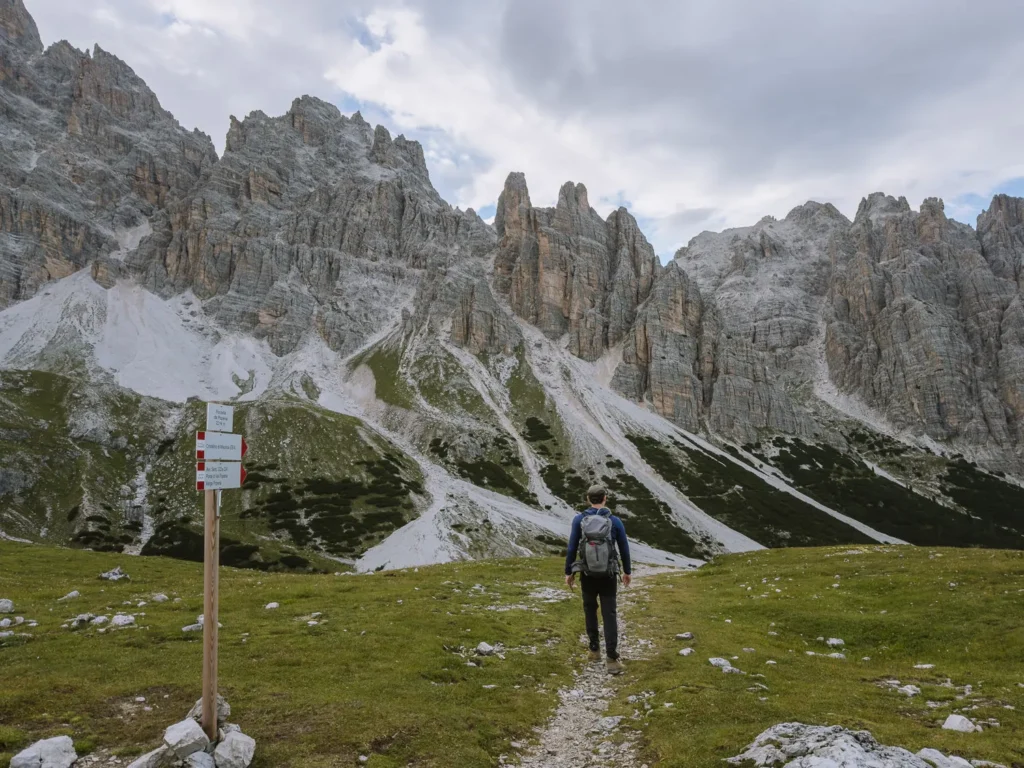
This Torre dei Scarperi circuit takes you to the very heart of the magical world of the Sesto Dolomites, where massive limestone peaks surround sweeping valleys filled with dwarf pines.
The trail has over 1,000 metres of ascent and descent, with a steep slog up a dramatic scree slope and an aided cabled section up a chimney. But it can be completed by anyone with reasonable fitness and enough mobility to handle some scrambling.
The rewards are sensational views over the three peaks of Tre Cime and an exciting trail. We completed the hike in peak season and saw only about ten people all the way round.
Highly recommend for those with a sense of adventure and a desire to get a bit more off the beaten track.
How to Get to Torre dei Scarperi Trailhead
The Torre dei Scarperi lollipop hike starts at Antoniusstein Car Park. The car park is closed to traffic between 8:45 AM and 6:15 PM, so either arrive early or take the shuttle bus below.
To reach the Antoniusstein car park by public transport, take bus 446 that runs between Dobbiaco (Toblach), San Candido (Innichen) and Sesto (Sexten). Get off at Bivio Val Campo di Dentro (Abzweigung Innerfeldtal) and walk around the corner, and then take the 449 shuttle bus to the car park.
More detailed instructions are available in our Torre dei Scarperi Guide.
Hiking Instructions
From Antoniusstein car park (1500m), follow path 105 along a mix of trail and road to Rifugio Tre Scarperi. Now bear right through a valley of white scree and dwarf pines, ending at the towering rock face of Monte Mattina.
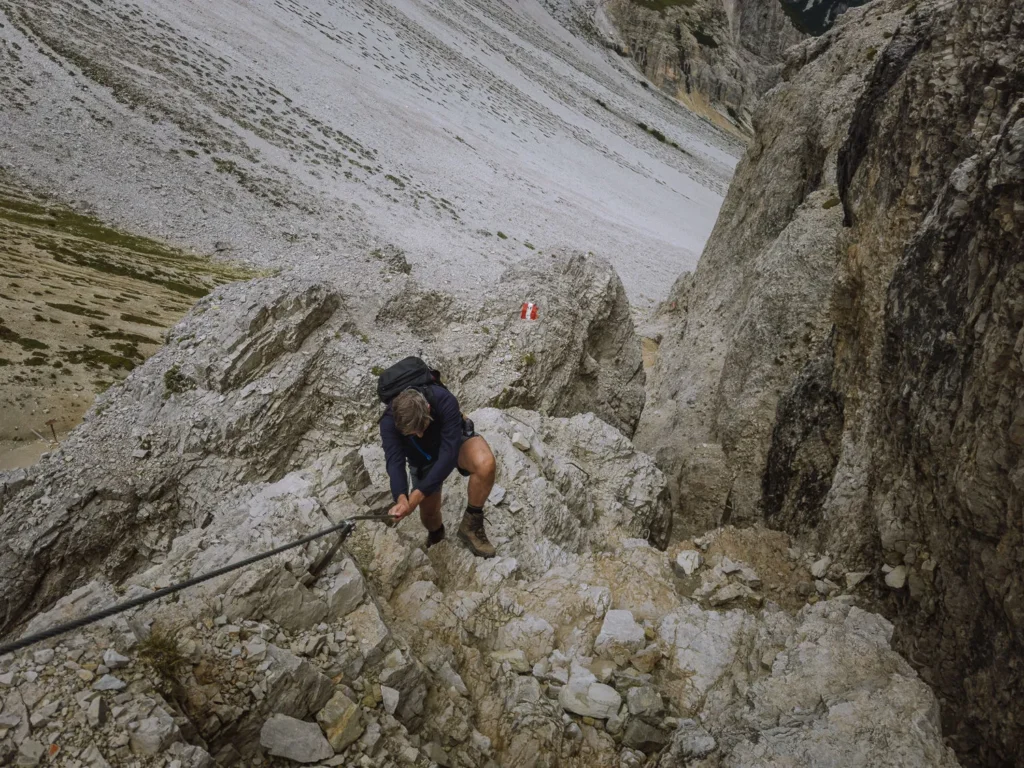
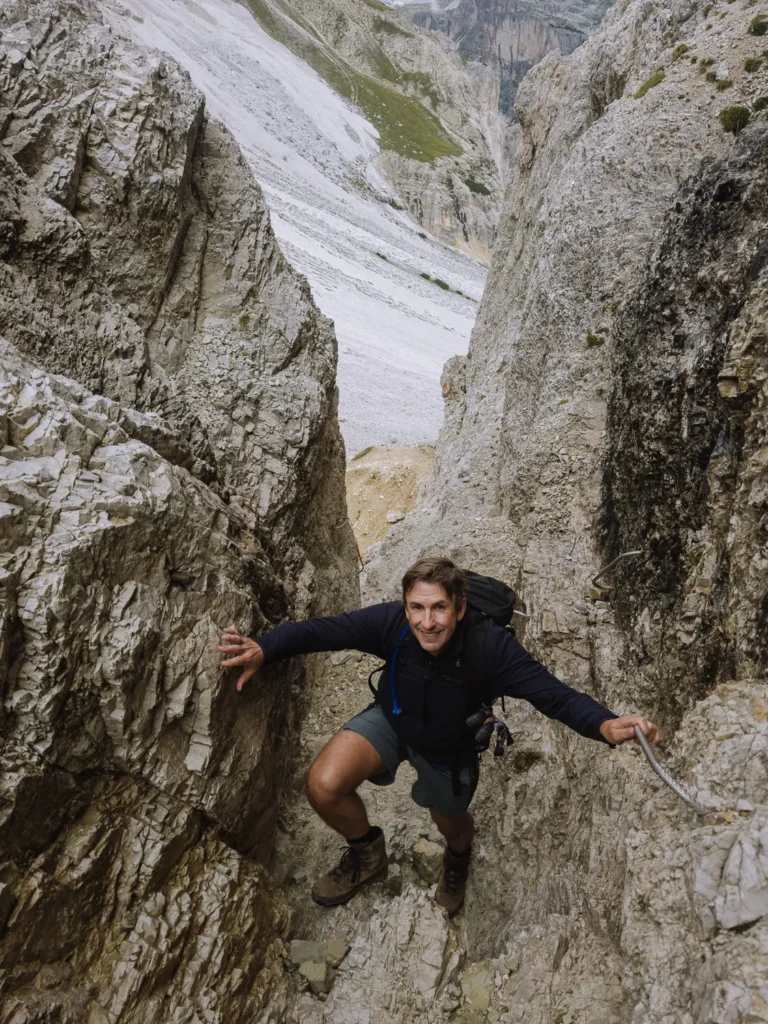
Turn right and follow path 9 as it steeply ascends a scree slope. It’s a tough slog that lasts about an hour, but suddenly you reach the pass of Passo Grande dei Rondo,i and from here onwards the views and path are excellent.
Above the pass is the tricky section. A cable helps you navigate four or five exposed steps, after which you enter a chimney. The chimney is steep, and a series of metal hand and footholds help with the ascent.
More detailed information about this tricky section is in our Torre dei Scarperi Hiking Guide.
Next, the trail contours around the Scarperi Tower, offering great views of the Tre Cime and Cadini. Finally, turn left and follow path 11A and 105, using a series of ledges, to drop back to where you started.
Facilities on Hike
Rifugio Tre Scarperi (Dreischusterhütte) is beautifully situated on the edge of Campo di Dentro Valley. Nestled beneath the rocky slopes of Cima Tre Scarperi, it has wonderful views up to Monte Mattina and across the white screes and dwarf pines that line the valley floor.
Unfortunately, it is the only rifugio on the hike and is near the beginning/end, so bring snacks and a lunch.
11. Sassolungo Loop
- Start / Finish: Passo Sella car park
- Distance: 17.6 km
- Duration: 6 hours
- Elevation: 1,000 m ascent and descent
- Difficulty: Medium-Difficult
- Map: Sassolungo Map
This hike completes a circuit around the Sassolungo Group. There is nothing technically challenging about the walk, but at almost 18 km and with 1,000 metres of ascent and descent, it’s a long, tiring yet extremely rewarding hike.
What makes it special is the way the trail clings to the boundary between meadows and rocky peaks.
On one side, the sheer-sided faces that make up the massif tower above the path. On the other, grassy meadows, alpine flowers and winding trails roll off towards the soaring spires of the Puez-Odle massif, the massive rocky lump of Sella and the craggy buttresses of the Catinaccio.
Perfectly positioned rifugios allow you to take a break whenever you want. Don’t miss the doughnuts at Rifugio Frederich August. It’s a great stop, less than an hour into the walk.
How to Get to Sassolungo Trailhead
The trail begins at the Passo Sella car park, which is a 20-minute drive from Selva, 30 minutes from Canazei, or 40 minutes from Ortisei. The car park costs €5 and fills up quickly, so get there early.
For public transport, the 471 bus runs from Ortisei and Selva in Val Gardena over Passo Sella (stopping at the car park) and then onto Canazei. It runs around every 20 to 30 minutes, but only in the summer months.
Hiking Instructions
Start at Passo Sella and head south, turning right on path 557 past Rifugio Frederich August and Rifugio Sandro Pertini to Rifugio Sasso Piatto. From here, head north-west downhill on path 9 for a short distance before turning right on path 527.
Continue on 527 (deciding if you want to take the optional ascent up path 525 to Rifugio Vicenza) until you meet path 526, which takes you past Rifugio Comici before dropping back to Passo Sella.
More detailed instructions and a downloadable map are available on our detailed Sassolungo guide.
Facilities on Hike
One of the best things about the Sassolungo hike is the excellent rifugios along the walk. Rifugio Friedrich August serves doughnuts and coffee for an excellent breakfast.
High up amongst a barren wasteland of rock, Rifugio Vicenza is our recommendation for lunch.


12. Vajolet Towers
- Start / Finish: Ciampedie Cable Car Station
- Distance: 12.5 km
- Duration: 4 hours 45 minutes
- Elevation: 1,275 m ascent and descent
- Difficulty: Medium-Difficult
- Map: Vajolet Towers Map
The Vajolet Towers are three spires of rock that stretch precipitously into the sky. They are perched above a basin of scree and rock and form one end of an amphitheatre of peaks and towers.
It is difficult to imagine how some of them are still standing. But standing they are, and exploring this barren wasteland of rock and stone makes for an excellent if somewhat challenging, Dolomites excursion.
This excellent there-and-back hike meanders through green meadows, scrambles up a rocky gully and contours across a basin of scree.
The views, especially in the second half, are spectacular, and the rifugios are some of the best located in the entire Dolomites.
How to Get to Vajolet Towers Trailhead
Park in Vigo di Fassa at the base of the Vigo – Ciampedie cable car. Take the cable car up to Rifugio Ciampedie to begin the walk.
For public transport, the 101 bus runs every 30 minutes up and down the Fassa Valley between Cavalese, Moena, and Canazei.
Hiking Instructions
From Rifugio Ciampedie cable car station, take path 540, making easy progress to Rifugio Gardeccia. The trail now steepens over a rocky outcrop to reach two spectacularly positioned rifugios, Paul Preuss and Vajolet.
From here, it’s a heart-thumping scramble up a steep 400-metre incline to Rifugio Re Alberto. Although it’s tough, the ascent is tucked away quickly, and steel cables assist in the harder sections. Nevertheless, the rifugio is a welcome relief on the barren rocky plateau.
A further gradual 100-metre climb brings you to Rifugio Passo Santner. Recently rebuilt, this dramatic modern hut of steel and glass has wide-ranging panoramic views to the west.
Head back the way you came. Full details are available on our Vajolet Towers Hike.
Facilities on Hike
There are plenty of facilities around the Ciampedie cable car station, including cafes, shops & toilets.
Just before the rocky ascent, Rifugio Paul Preuss and Rifugio Vajolet are great places to refuel. But for lunch in a true wilderness, eat at either Rifugio Re Alberto or the rebuilt Rifugio Passo Santner.


13. Lago di Sorapis
- Start / Finish: Passo Tre Croci
- Distance: 15.7 km
- Duration: 5 hours 30 minutes
- Elevation: 750 m ascent and descent
- Difficulty: Difficult
- Map: Lago di Sorapis Map
Lago di Sorapis is a glistening turquoise lake backed by the craggy buttresses of the 3,200-meter mountain which shares its name. It’s a stunning destination and worthy of the hike.
There are two ways to get there: an easier there-and-back hike of medium difficulty, and this more challenging option.
What makes this route challenging is not the length or the ascent, but the terrain. There is a tricky ascent up a rocky ravine and then a cable-assisted section along a narrow ledge.
You can read about both options on Lago di Sorapis Hike. Just be aware that the there-and-back hike has become very popular, so much so that in peak season, the path can get a little crowded and unsafe.
How to Get to Lago di Sorapis Trailhead
The trail begins at Passo Tre Croci, which is a 15-minute drive from Cortina d’Ampezzo. Parking is free and available along the side of the road. However, this walk has gotten very popular. In peak season, you may need to be here before 8 am to be sure of a park.
For public transport, take the 030 bus from Cortina (20 minutes).
Hiking Instructions
For the there-and-back hike, take path 215 from Passo Tre Croci. It gently climbs through trees and is mostly straightforward. Higher up, the path narrows, and in a couple of places, cable-assists and some metal steps help you along the way.
Large numbers on the path can make it a little scary. After about 90 minutes, you reach the lake, then simply return the way you came.
For the more challenging route, take path 213 from Passo Tre Croci. Climb steadily through the forest, then turn left on path 216. The route now heads across scree and climbs very steeply up a rocky ravine. There is a lot of loose rock, and good footwear is essential.
Now cross a wide basin, then over a narrow ledge (cable assisted), before dropping down to meet path 215 and turn right to reach Lago di Sorapis. After exploring the lake return to Passo Tre Croci on path 215 – joining hundreds of other hikers on the there-and-back route.
More detailed instructions and a downloadable map are available on our Lago di Sorapis guide.
Facilities on Hike
Rifugio Alfonso Vandelli sits just below Lago di Sorapis. It serves simple food and drinks during the summer. It opens later in the year than many other rifugios, so check ahead.


When to Go Hiking in the Dolomites?
The Dolomites hiking season runs from June to September.
The best time to visit is the first few weeks of July. Flowers carpet the upper meadows, and the snow should have cleared from the higher trails.
Early September is also excellent, as summer crowds die down but the weather remains fine.
Early in summer, snow can linger on higher ground, making some paths impassable. Cold weather and snow can return as early as October.
The cable cars close at the end of the ski season, and while some of the larger ones reopen in late May, many others don’t return to service until mid-June.
Most of the rifugios – such a great part of hiking in the Dolomites – also shut after winter. Some don’t reopen until mid to late June.
Avoid August if possible, as the school holidays bring large crowds.


Where to Stay?
Our favourite hikes in the Dolomites are spread across a large area. However, you can choose a location that allows you to access several of these walks fairly easily.
Val Gardena
Val Gardena is one of the most popular hiking destinations in the Dolomites. From its two main towns, Selva (Wolkenstein) and Ortisei (St. Ulrich), cable cars rise into the mountains, connecting many hiking trails.
Stay here to do the Seceda and Sassolungo hikes.
- Chalet Pra Ronch (€€) is a good value stay located in the centre of Selva
- Residence Larciunei (€€€) in Ortisei is stylish self-catering accommodation
- Hotel Luna Mondschein (€€€€) is a modern property with all the trimmings.
For more details on the area, read our guide to Val Gardena.

Cortina D’ampezzo & Dobiacco (Toblach)
The two main centres in the north-eastern section of the Dolomites are the towns of Cortina d’Ampezzo and Dobbiaco. Cortina is more picturesque and better if you have a car, but Dobbiaco has more comprehensive public transport options.
Stay here for Tre Cime di Lavaredo, Cadini di Misurina, Via Fiscalina, Torre dei Scarperi, Lago di Sorapis, and Lago di Braies hikes.
- Hotel Al Larin (€€) is a great budget-friendly option in Cortina
- Hotel Rosegarten (€€) is a traditional, family-run establishment in Dobbiaco
- Cristallo Resort & Spa (€€€€€) is a luxurious stay on the outskirts of Cortina.
For more information on the area, read our guide to Cortina d’Ampezzo.

Val di Funes
Val di Funes is an idyllic valley with very few services. While it can be reached on a day trip from Val Gardena by bus, it can also make a good base if you want to get away from it all for a few days.
Stay here for the Val di Funes Panoramaweg and the Adolf Munkel Trail.
- Fallerhof (€) is a great budget property in the centre of the village
- Haus Puez (€€) has comfortable self-catering apartments with stunning views just outside the village of San Pietro
- Proihof (€€) is an alpine gem 5 minutes’ drive from Funes.
Read our guide to Val di Funes for more information about the area.

Gear & What to Take
Hiking Boots – Some of these hikes are reasonably long, and the paths are uneven in many places, so we suggest wearing proper hiking boots (we use something similar to these).
Hiking Poles – We’re recent converts to hiking poles, which take a lot of strain off the legs. We use the trusty Leki sticks.
Waterproofs – Weather conditions in the Dolomites can change dramatically (as we found out), and rain is common in the afternoon. Make sure you take a waterproof like this one.
Sun Block/Hat – Over the peak period, the Dolomites can get hot and sunny. Sunblock and a hat are always a good idea.
Snacks – All these walks have at least a rifugio, but if you are hiking at either end of the season, check that they are open. In any case, you probably want to bring some snacks for energy.
Water – Make sure you have plenty of water. We used one of these hydration packs, which makes it much easier to stay hydrated on the trail. Alternatively, this is our favourite hiking water bottle.
Maps – All the routes are well marked, but make sure you have a good idea of where you are going. Ideally, take a physical map or download the maps from our more detailed posts onto your smartphone. If you like physical maps, the ones you need are: Cortina map / Vajolet Towers / Val Gardena / Brenta.
Photography – We recommend good-quality ND Filters for capturing the lakes and a decent tripod; the Ultralight Sirui is the best we’ve come across.
Drones – Drones are permitted on some of these hikes, but check before you set off. We use the very light and excellent DJI Mini Pro.


More Dolomites Guides
- Here are all our favourite places to visit in the Dolomites.
- Put your trip together with our Dolomites road trip itinerary.
- Hike to the beautiful Lago di Sorapis.
- Try one of our favourite hikes in the Dolomites.
- The Sassolungo Circuit is one of our favourite walks in the world.
- Take on one of the most popular hikes in the Dolomites – Tre Cime di Lavaredo.
- Visit the beautiful Lago di Braies.

reader-supported
When you buy through links on our site, we may earn a small affiliate commission at no extra cost to you.
Thanks for your support // Paul & Mark
Helpful guide for me! Thanks for your sharing!
Thank you, glad you found it useful.
Great guide! I’m going to the Dolomites in June and will definitely follow some of your recommendations! One question, I will be relying on public transportation to get around and it looks like it takes many bus transfers to get from one side of the Dolomites to the other (e.g. from Bolzano to Cortina d’Ampezzo). Do you have suggestions for an easier way? Or perhaps I should stick with one region of the Dolomites to maximize my time?
Hi Katie –
Thank you, glad you found the guide helpful. It really depends on how long you are going for. If you’re visiting for up to 5 days, there’s more than enough to do in and around Ortisei and Selva so you could base yourself in either of those places without needing to travel further. If you’re going for longer than 5 days, we’d recommend basing yourself in Ortisei/Selva for half the trip and Cortina for the other half.
Hope this helps.
Paul.
Wonderful highlights of great tourist attractions which deserve to be visited.
Personally i have visited 1 time turquoise waters of Lago di Sorapis with my family from Dubai and i really enjoyed my time with my family.
We can’t thank you enough for putting these guides together. We have just completed all the hikes in your Domolites itinerary. We followed your recommendations pretty much as you described and we had a great time.
Wowww really amazing content really inspired.
Thank you for sharing your experiences.
I love northern Italy, but for some reason have never hiked there.
Are there any of your suggested say hikes that are impossible to do with dogs?
I never hike without my fourlegged family.
Hi Susanne, We don’t have a dog so never quite sure how easy it is to walk with one. However, Tre Cime, Lago di Braies, Val di Funes, Brenta Dolomites and Adolf Munkel should all be straight forward. There is a thin section on Lago di Sorapis which has a railing (for humans), and there are small sections of clambering on Sassolungo (but not much) which a dog may find difficult. I would probably avoid Vajolet Towers which is rocky and steep with metal railings for a few hundred metres. Hope that helps. Mark.